
Hurricane Forecast Model Plot
When
the hurricane model plot program is started, the user is presented with the above
screen. At this point the user can select
the mapping area they are interested in via zoom in (rubber band area with mouse)
or zoom out (right click) and then perform the program functions. The model data
is downloaded via the HURRTRAK ONLINE service.
In addition to manually requesting the model data, by setting the HURRTRAK
ONLINE Automation option, you can force the system to check for new data on a regular
basis.
There
are 2 program controls which determine which model forecast will plot.
-
The
Date selection box which contains a date and time field.
-
A
duration (hours) field box which instructs the system how far to look back from the
date selection.
i.e.
The example above is showing all model forecast that were issued within 8 hours of
8
MOUSE
Options:
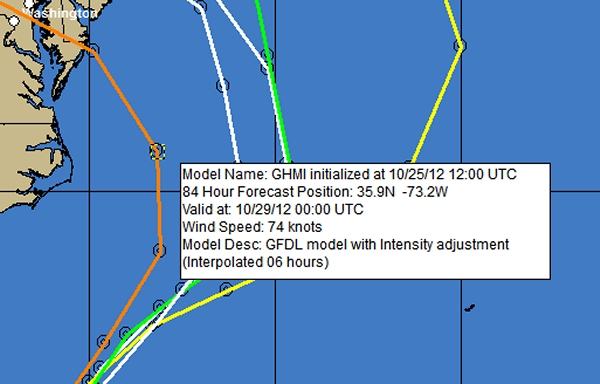
When the user moves the mouse over a model verification point, the name of the model and description will be displayed in the status bar at the top of the map image. In addition, as you pass the mouse pointer over an observation, a popup window will appear providing more information.

TOOLBAR Options:
An important Toolbar option allows the user to
select the models they would like to Plot. By selecting the following icon...
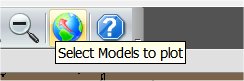
the following model selection screen will be displayed....
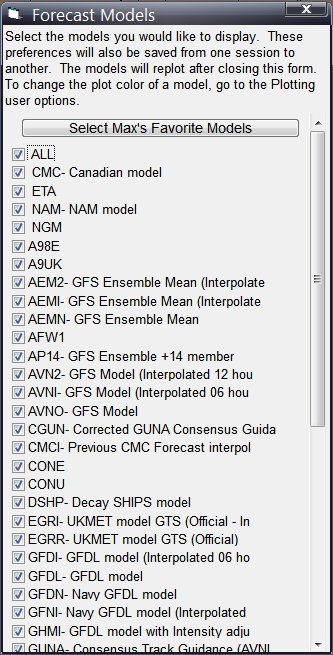
Simply select
the models you would like to see plotted and uncheck the ones you do not want to
see. An additional option of "Max's Favorite Models" will select
only the hurricane forecast models that are on Max Mayfield's preferred list.
This may vary from time to time as models change. The selected models will be preserved
between ModelPlot sessions.
Menu Options:
While using the model plot program, the following menu options are available.
Exit
- Closes
this window
Annotate
- The
annotate feature here is identical to the one described earlier.
Send
-
Sends the current image to an Email recipient.
For more
Print
- The
print options here is the same as those described earlier except
that the fax print option is not available.
Google Earth Export - This option allows the user to export the current image or the currently displayed forecast model (KML) to Google Earth.
Save
Image -
The save image options here are the same as those described earlier..
Options - This option allows the user to change the width of the forecast models lines or select which models to plot.
Help
- Displays
help